Hiding things at plain sight
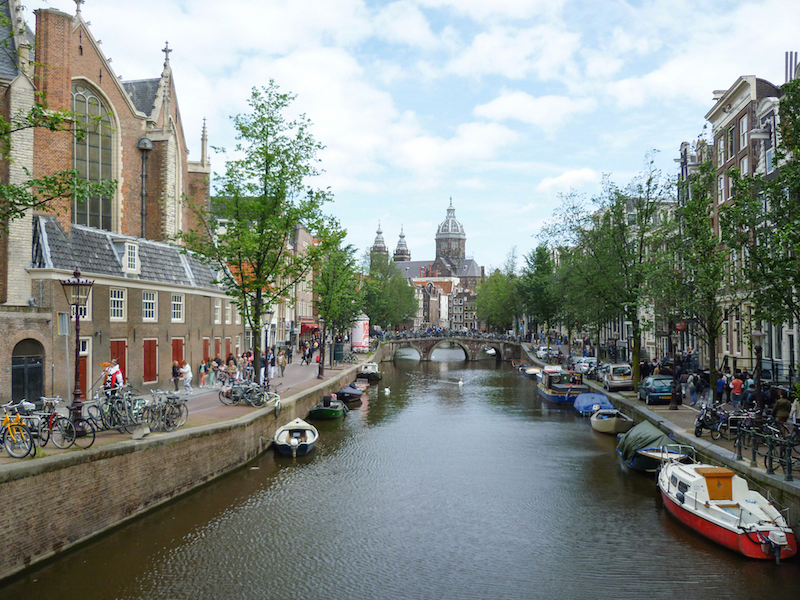
Take a look at this picture from Amsterdam.

What do you see?
I see a beautiful canal view with a bridge at the bottom on a Spring day (I knew it was Spring when I shot it).
Do you see anything else? Something that doesn’t belong to the picture, something that shouldn’t be there…
No, me neither. We don’t see it because it’s not meant to be seen, it’s concealed in the image.
This was brilliantly put a long time ago:
“What if the best way to hide something is at plain sight, where no one would suspect?”
Edgar Alan PoeThe Purloined Letter
History
Yeah, like I’ll try to outperform Wikipedia. Check Steganography
Technique
The most common form of Steganography is called LSB for Least Significant Bit.
This uses the fact that a slight change in a pixel’s color is undetectable by the human eye.
Check for instance the samples below.
Sample 1

Sample 2

Can you spot the difference?
You don’t believe there’s a difference at all? Use a color meter to check it.
Both images are in full color. The first sample is Red = 108, Green = 118, Blue = 154. The second sample is Red = 109, Green = 119, Blue = 155.
As you can see in the second sample every Least Significant Bit is modified. This is the maximum change you can perform in a single pixel (changing every color component). If we change 1 bit per byte then we’re changing 1/8 of the file or 12,5% of it.
If you can’t tell the difference at this scale (a 600 x 450 pixels image) imagine realizing that a single pixel has been modified.
So if this is undetectable then perhaps we can use this slight change in our favor…
Algorithm
Here I describe the basics of the algorithm used to hide the image (and thus to recover it).
The input image (the host) must be in RGB format. Each pixel is defined by the colors Red, Green, and Blue. Therefore each pixel needs 3 bytes.
We said we will use the least significant bit for each byte, so for one pixel we have:
![]()
3 bits (the least significant of each byte), so if we take 3 pixels we have 9 bits at our disposal.
We can use the first 8 bits to embed a single byte from the data we’re hiding and the last bit can be used to signal the end of the buffer. If the 9th. bit is 1 that means it’s the end of the buffer, otherwise, we keep reading until a 1 is found. This allows us to embed several different sections of data in the same image.
This algorithm stores two sections of data, the first section is the filename and the second section is the file data.
Starting at the first pixel the name of the file being hidden is stored. Then after the name (when the algorithm detects an end of the section as described above), the actual data of the file is stored, byte per byte.
To recover the file then an application should first read the file name, and then the file data. Once finished it can create a file with the name obtained and write each retrieved byte.
The idea behind steganography is that you can hide things where it’s not evident that something is concealed. Unfortunately, this common mechanism is widely known and studied and there are several countermeasures, based mostly on statistical analysis and histograms of pixel color distribution (because this technique is not symmetric, you can investigate LSB Matching for a fix to this problem).
To overcome this you can encrypt the data before embedding it in the file which will make obtaining the original file even harder. This file is not encrypted but the tool outlined at the end of the article supports encryption by providing a password.
So with all this information, you should be able to find the hidden file in the picture of Amsterdam. It could be a good opportunity to test bitwise operators and operations in your favorite language.
If you want to discover the hidden file and don’t want to build an application to do it you can use a simple tool I built for this post: Steganography command line tool
Just install the tool and do
$> steganography dig-up amsterdam.png .
This will extract the embedded file in the current folder (enjoy it, it's a beautiful short story).